One way to increase curb appeal to your property is to install new asphalt paving. You may also be experiencing less functionality from your driveway because of the accumulated wear and tear it has gone through over the years. Whichever the case may be, installing a new asphalt driveway is no easy task. The quality and life of your driveway depend heavily on how well the underlying base is prepared. If all of the processes are not strictly followed, the surface may fracture, crumble, and create potholes. Here are tips to prepare your driveway for asphalt paving that will look and function as intended.
1. Remove old paving
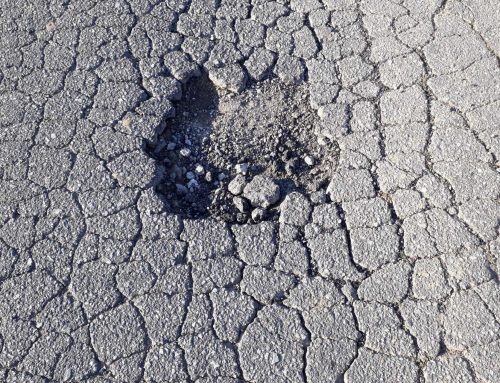
Over time your driveway will begin to show signs of damage and distress. With the changing seasons and heavy use, given time, cracks, potholes, and fading are inevitable even with proper maintenance for any driveway. Hence why a driveway replacement is necessary. In some cases, you could potentially pave over the old driveway but more often than not it is more advisable to remove the old driveway and install new asphalt paving. To prepare for new paving you would first need to remove the old surface for a number of reasons. Removing old paving allows for a fresh foundation to be installed, as redoing the base will increase the durability of the newly installed asphalt driveway. Removing the old paving also saves on maintenance costs down the line. This is because a completely new driveway will not need constant maintenance compared to an old driveway that was paved over.
Asphalt driveway removal can be done using a jackhammer to break up the surface or a circular saw to cut the pavement into smaller pieces. However, the most efficient way to tear out old asphalt is with an excavator. Regardless of the machinery you choose, you must account for the waste and proper disposal of the old materials. Depending on the size of your driveway, a massive amount of heavy debris will need to be hauled away in a dump truck and taken to a dedicated recycling center. Removing the old paving is an essential step in preparing for a fresh installation, requiring specialized tools and heavy-duty experience that only professionals can reliably provide.
2. Remove tree roots
Some homes may have well-established trees near or around their driveway that add a natural look to the front of their property. However, it may not be visible above ground but large trees could potentially have roots spanning underneath the driveway. Clear evidence that a tree has been planted too close to a driveway is the appearance of root cracks. They can appear as winding, raised linear bumps and can eventually open up to become larger cracks. If you have trees near your driveway, it is best to remove any roots that have grown underneath the driveway.
To remove tree roots from your driveway, removal of old paving will need to be completed first to fully see the extent of how far and deep the roots have penetrated the old driveway. In preparing your driveway for asphalt paving, you will need to remove all the roots in its direct vicinity to avoid future damage. Placing asphalt paving on top of tree roots will only result in a compromised driveway that will not last.
3. Inspect the soil
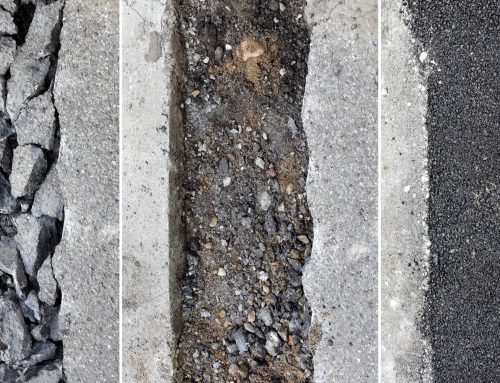
This stage is heavily influenced by your local soil type and the sub-base solutions you choose. The task is straightforward if you live in an area with well-drained sandy or rocky soil, or if your current driveway already has a suitable base. In those ideal conditions, crews can simply inspect and compact the existing surface while paying close attention to drainage. However, locations with loamy soil or moist clay require outdated materials to be completely removed and replaced. In some circumstances, contractors will lay geotechnical fabric beneath the new base material to prevent damp soil from penetrating upward. This extra layer acts as a shield that significantly extends the lifespan of your driveway in difficult terrain. Ultimately, evaluating the ground beneath your asphalt is absolutely essential to ensure a surface that looks appealing and functions properly.
4. Ensure proper drainage
Proper drainage is equally as important as the asphalt layer on top of your driveway. It avoids excess wear and tear on the surface. Water might not seem like an issue but standing water on an asphalt surface can cause it to discolor and crack quickly. Along with keeping water away from the surface of the asphalt driveway, grading the sub-base also prevents water from coming towards the property and its foundation. Grading the sub-base is an important step in preparing for asphalt paving because it keeps water moving toward the roadway and prevents it from pooling. Grading also levels and smooths the sub-base to help produce an even and appealing driveway. It is essential in preparing your driveway for asphalt paving.
5. Adequate sub-base compacting
A properly compacted sub-base is crucial for a long-lasting, smooth driveway. If the sub-base lacks sufficient compaction and even density, the pavement may droop. This structural sag produces low patches that fail to drain water correctly. A poorly prepared sub-base also causes premature cracks and other severe surface issues. Crews must use specialized equipment, such as heavy roller compactors and vibrating plate compactors, to achieve the necessary density. This critical procedure takes time and relies heavily on the installer’s field expertise. The heavy machinery will make multiple passes over the area until the prepped surface is absolutely ideal. Cutting corners on compaction is simply not an option.
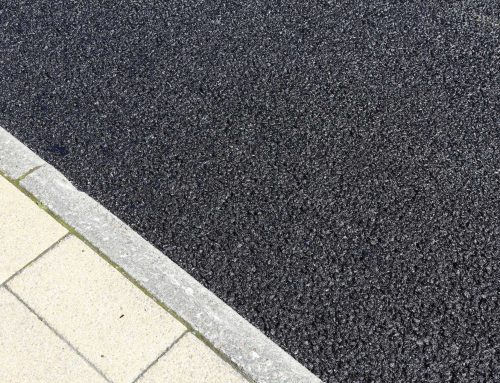
Preparing your driveway for new asphalt paving is vital to installing an appealing, functional surface. Following these prep steps will greatly improve the final outcome, making them practically mandatory for success. You can ensure proper installation by choosing the right contractor with the appropriate experience and advanced machinery. Thanks to their extensive project background, these professionals understand that careful preparation is the most crucial element of the job. Their expertise is what transforms loose stone into the smooth, flawless black carpet of pavement you expect and deserve for your property.